Today's post is a DIY on a cute preppy ribbon and bead bracelet. It's super easy to make and looks great in a stack
 |
| from left to right: what you are learning to make today, hand made, forever 21 |
___________________________________________________________________________________
What you need:
- 1/4 inch ribbon 2-3 times the size of your hand
- elastic the size of your hand plus about 5 cm
- pliers (chain nose works best but any one will do)
- Pearl beads of your choice (about 5mm in diametre)
- 2 callottes (optional)
- a clasp of your choice (optional if you are using elastic)
- a needle
________________________________________________________________________________
This first part is if you want to finish off your ends neatly and make it look more professional. You don't have to do it, but I recommend attempting it even if you are not crafty. It really isn't that hard. If you chose not to do this part, simply tie a knot at the end, leaving room to tie on the clasp/ tie the ends together and skip the next photo.

Thread on the callotte as shown and tie 1 or 2 knots at the end to prevent it from sliding off.
Squeeze the two round parts of the callotte together as shown. That's it! You've just finished your ends and look at how neat they look.
Skip this step if you opted not to use a callotte.
Thread the eye of the needle about 4 cm down the other side of the elastic. Thread the needle through one end of the ribbon.
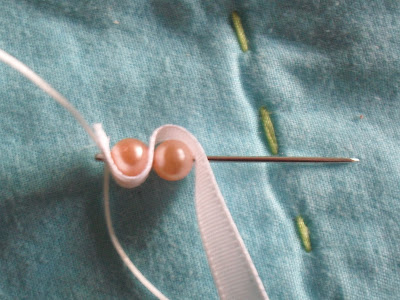
Thread one bead onto the needle and fold the ribbon over as shown. Repeat this step until you have about an inch short of your desired length.
The easiest way to thread on the beads and ribbon is to not push the beat and ribbon down but simply push it off the needle just enough to thread on another bead. Does that make sense? It's hard to explain.
 |
| What it should look like when you have the length you want. |
When I was making mine I forgot to take into account the callotte and clasp and ended up making mine a bit long. To make up for that, I just attached the two callottes together and left out the clasp since it's elastic anyway.


No comments:
Post a Comment